Having decided on a goal, it’s now time to rough out the approach. Basically, what do I need to do to make this happen?
- Decide on regular DNS or Dynamic DNS to provide an external DNS hostname so other peers can find my instance.
- regular DNS
- Domain: perivid.xyz
- Registered, registrar chosen, domain chosen.
- DNS A record pointed at my external WAN address (that rarely changes)
- Domain: perivid.xyz
- Keep an eye on my external address for any changes (there are utilities you can use to watch the external address and notify you when it changes – also my external IP address has only changed once in 3 years, so I’m not super concerned)
- regular DNS
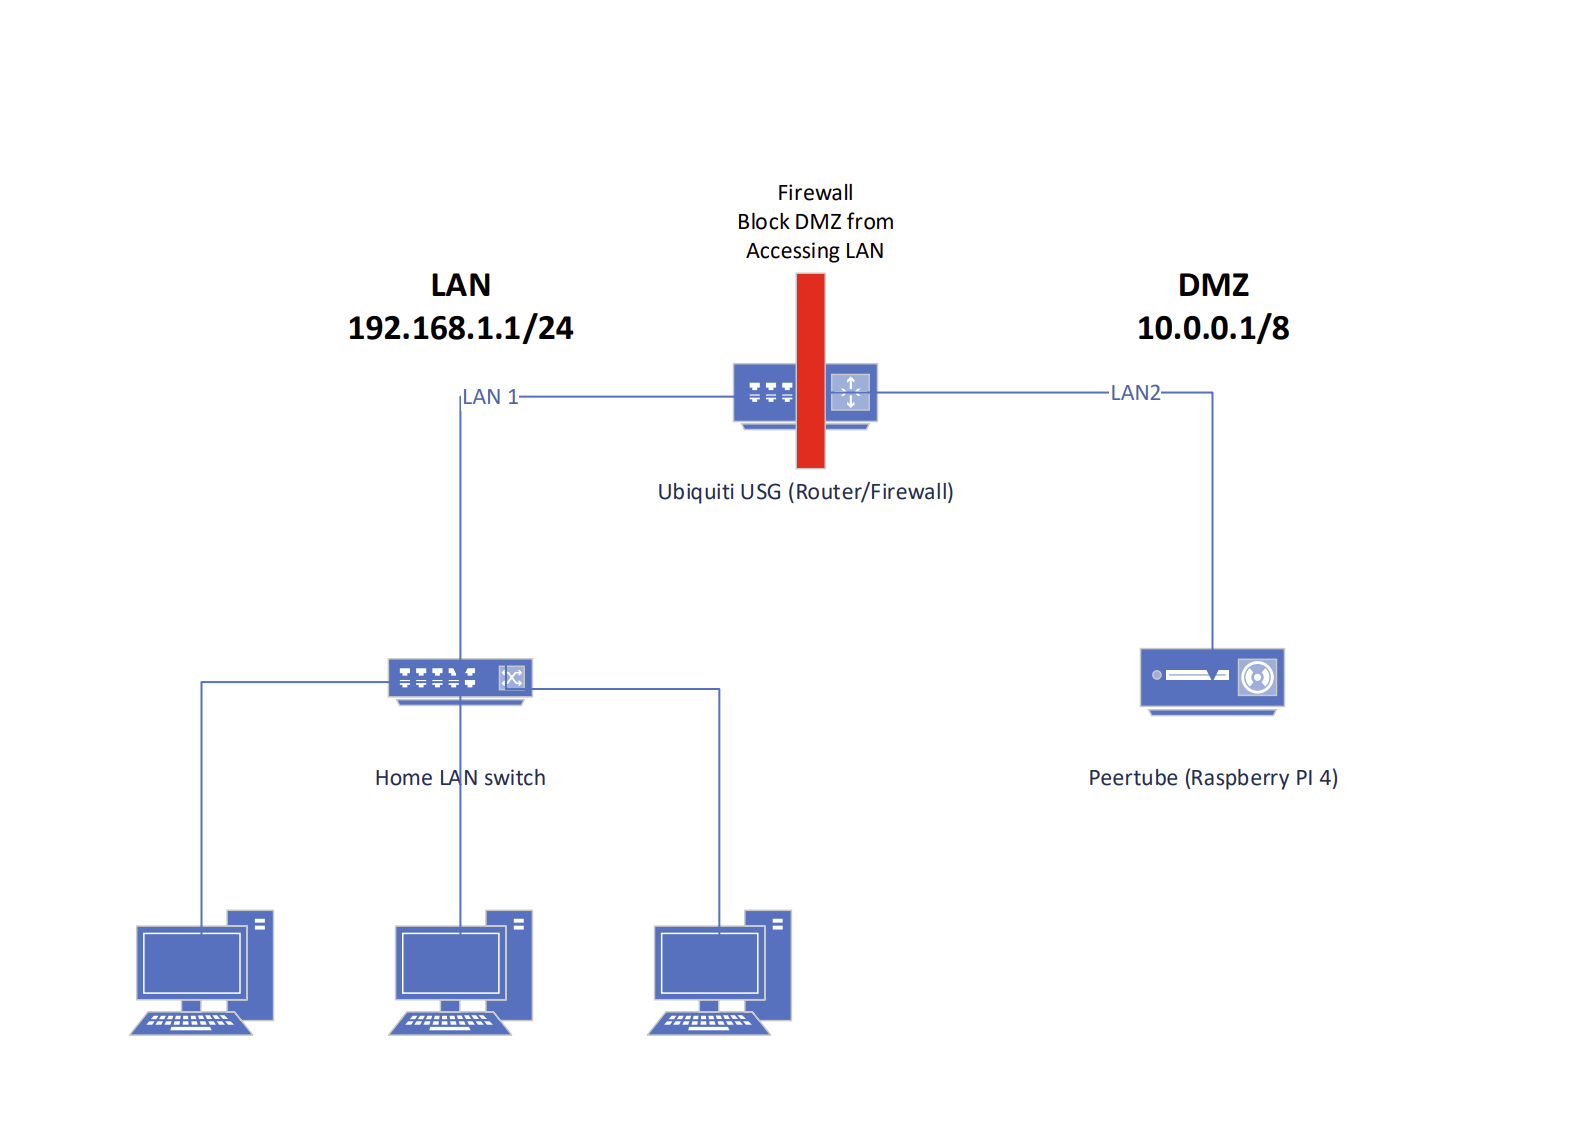
- Configure router/firewall to activate separate network on second LAN port, and configure firewall.
- Activated separate network with entirely different subnet (diagram does not reflect reality, only allegory)
- Added firewall rule to drop all packets from DMZ on LAN2 to LAN1
- Acquire hardware:
- New, bigger, microSD card for Raspberry PI (256 GB).
- External USB SSD drive (1 TB, USB-C with USB-A adapter)
- Managed Ubiquiti 5 port switch for the small DMZ network
- All awaiting delivery
- (These steps per YouTube video on how to set up PeerTube on a Raspberry PI 4)
Install Raspbian LITE on 256 GB microSD card- This is done via a utility that runs on a host computer, usually.
- Attach external drive to Raspberry PI and partition it, and verify it works as a filesystem.
- Install Dependencies for PeerTube
- By this point, the Raspberry PI is either connected to the DMZ with another computer using ssh connected to it, or I may run it within the LAN itself – it probably doesn’t really matter too much security-wise, though it would probably be prudent to plug it into the switch that connects to LAN 2 as soon as convenient, just in case.
- Install PeerTube
- Configure PeerTube
- Test PeerTube
- Troubleshooting
- Set up port forwarding rules on router to forward traffic to the Raspberry PI instance of PeerTube
- Troubleshooting
- Move forward with creating user account and configuring both the Instance and my user account Channel, playlists,, etc.
- Figure out how to federate instance with other instances.
Done!
I’ll update this outline as more steps becoming apparent via the how-to and related videos.
This post is number 2 in a series. As it progresses, I’ll update the table of contents below so you can find other parts.
One response to “A grand project – Streaming and Video Hosting – Part 2 – Design, Planning, and Notes”
[…] Part 2 […]